

EPDM coating installation
installation and advice
EPDM Coating Installation and Advantages:
EPDM coatings are ideal for flat roofs due to the following properties:
*Lasts 40-50 years without problems
*Withstands temperatures from -40°C to +120°C
*Sun damage-free – no peeling or cracking
*Environmentally friendly with a long service life
*No need for regular maintenance or upgrades
Why choose us?
Our team performs all work meticulously and responsibly, aiming for the highest quality. Every stage is important to us, so we work carefully and professionally. Before starting work, we ensure that the base is properly prepared, especially if insulation work is being carried out on a reinforced concrete slab. We perform installation work precisely – gluing or mechanically fastening, depending on what best suits your home’s roof and ensures longevity. We pay particular attention to seam installation, corners, valleys, and areas where the roofing intersects with windows or other elements. We work to ensure that every detail is flawless. After completing the work, we check every seam, flashing, and perform a visual inspection. It’s important to us that everything is done impeccably. After the work, we provide all necessary documentation and offer a warranty so you can be confident in the quality of the work performed. We work with passion for our craft and always strive for the best result.
Why people choose us
Experience: we’ve been installing carpets for over 10 years and we know what we’re doing.
Only quality materials: we only use reliable, certified materials that are guaranteed to last.
Consultation: throughout the process, we provide advice to help resolve any problems that may arise (there are many in construction 🙂
Warranty We offer a long-term warranty on our work and materials.
Good value for money We offer good EPDM coating price and quality ratio.
Choose a reliable roof covering
This membrane will protect your roof for years to come. The most important thing is quality installation, which is what we provide.
Call us today for a free consultation and price quote.
Reliable coating, quality work, long service life – that’s why you should choose us!
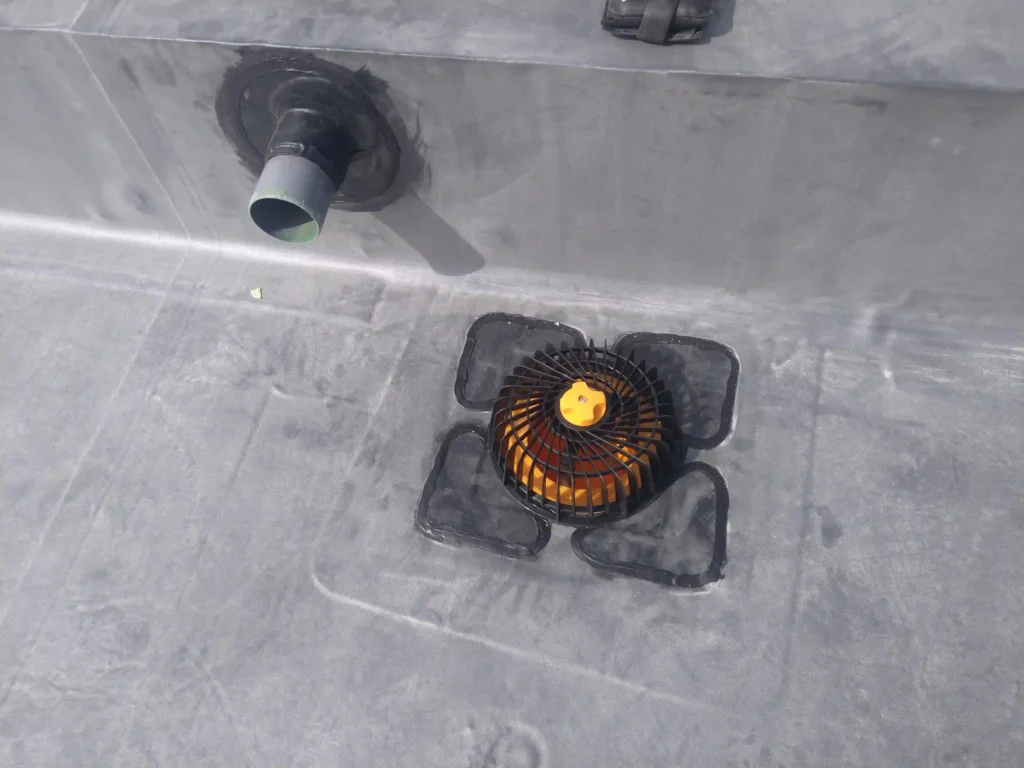


EPDM coating installation:
Preparation and Storage
EPDM coating installation: it’s very important to assess your capabilities and resources. I always recommend consulting with professionals. Let’s start with the base. The substrate must be dry and clean (a garden blower helps a lot; if there is still dew in the morning, a wet vacuum cleaner will also be needed).
Installation Process:
The type of substrate for installation essentially makes no difference. The installation principle is the same, the goal is also to do everything as well as possible 🙂 The most common are Insulation layer on reinforced concrete or moisture-resistant board on wooden structure. Is a different EPDM coating installation possible? Yes, installation with ballast systems or mechanical fastening is also possible.
Membrane layout and preparation
Before starting to glue, the membrane should be laid out and allowed to relax for about 15-30 minutes so that the EPDM coating can adapt to environmental conditions. During that time, the reinforced perimeter strip can be fastened. The reinforced strip must be installed around the entire perimeter, mechanically fastened every 30 cm with fasteners (on a reinforced concrete slab) or using metal plates (on a wooden slab). (Although regulations do not require it, we also glue it with EPDM coating contact adhesive)
- Gluing and joining
We glue the EPDM membrane using a special adhesive gun. CAV-GRIP III (available from us) must be sprayed evenly on both the membrane and the base. It’s important to ensure that the adhesive layer is sufficiently thin and even, avoiding excessive adhesive that can cause bubbles or swelling. It’s important to wait for proper adhesive drying, which can be checked visually: the adhesive changes to a matte color and doesn’t stick to your finger when touched.
After gluing, the membrane should be gently pressed and smoothly brushed onto the base using a soft brush or roller to ensure good adhesion.
- Seam joining
When joining two EPDM sheets, they must be bonded with special tape – Seam TAPE, and a primer should be used to improve adhesion. Seams must slope downward, with a minimum overlap width of 12-15 cm to ensure a reliable seam. After gluing one sheet, mark a line for primer application, about 15 cm from the edge, using a chalk line. Apply primer (shake well first or mix with a mixer) with an abrasive sponge, wait for it to dry, and then apply SeamTape seam tape. The tape is applied about 5-8 mm from the primer edge so the primer extends beyond the seam tape, avoiding areas where the tape doesn’t adhere. Then roll with a silicone roller.
- Additional elements:
All pipe, corner, and other penetration joints must be properly sealed using special EPDM flashings or flanges to prevent water infiltration.
Tips and Important Notes.
- Follow temperature recommendations – installing at temperatures below 4°C may reduce adhesive bonding quality.
- Regularly check adhesive drying and, if necessary, additionally press the membrane with a roller or soft broom.
Finishing work and protection
After installation, it’s important to ensure that membrane seams and joints are properly treated and sealed, and the roof is protected from mechanical damage (especially when there are multiple roof levels and facade work is ongoing).
EPDM edge sealant and vulcanization process
EPDM edge sealant is indeed used during the vulcanization process, which takes about 30 days after EPDM coating installation. Here’s what’s important to know:
- The vulcanization process is a chemical process during which the EPDM coating and joints fully form and achieve maximum strength. This process occurs gradually and takes about 30 days after installation.
- Edge sealant function – this sealant is used to protect membrane edges and joints precisely during this vulcanization process, when joints have not yet reached full strength.
According to available information, some sealants remain effective for up to 12 months (depending on the manufacturer).
EPDM coating installation completed 🙂


Frequently Asked Questions About EPDM Installation
How long does EPDM coating installation take?
For a simple cold roof (garage, outbuilding) – typically 1–2 days. For a new insulated residential roof with vapor barrier, insulation, slope formation, and parapets – from several days to a week or two, depending on the area and number of details. We provide an exact timeframe after evaluating the site.
What substrate can EPDM coating be installed on?
The most common substrates are reinforced concrete slabs with an insulation layer or moisture-resistant board on a wooden structure. The key is that the substrate must be dry, clean, and level. Ballasted installation or mechanical fastening is also possible – we select the method based on the structure.
Can EPDM coating be installed in cold weather?
Adhesive work requires a temperature of no lower than about +4°C – in cold weather, adhesive bonding quality drops. Therefore, the main adhesive installation season is during warm weather; mechanical fastening work has fewer restrictions.
Can I install EPDM coating myself?
For simpler projects – a garage, canopy, shed – yes, if you carefully follow the technology; you can get all the materials and consultation from us. For an insulated residential roof, we recommend experienced professionals: mistakes in seams, parapets, and details only become apparent over time and cost more than the labor.
Why does vulcanization continue for about 30 days after installation?
Vulcanization is the process during which EPDM joints fully form and reach maximum strength. It takes about 30 days after installation, so membrane edges and joints are protected with Edge Sealant during this period.
How much does EPDM coating installation cost?
EPDM installation work alone – from ~€8.5/m². The complete work package with insulation and slope installation – from ~€27/m², and a complete new insulated roof with materials and labor typically ranges from €105–135/m² + VAT. Ranges, cost breakdowns, and sample calculations – on the page EPDM Coating Price 2026.